An easy DIY box braids tutorial begins with washing and detangling the hair to ensure a clean base. Next, the hair is sectioned into small, even parts using clips or hair ties. If desired, synthetic braiding hair can be added to each section for extra length and thickness. Then, using the box braiding technique, each section is braided, incorporating the extensions if used. The ends of each braid are secured with small elastic bands or sealed with hot water for synthetic hair. This process is repeated until the entire head is braided. Once complete, the braids can be styled with beads or other accessories if desired. Regular moisturizing of the scalp and braids helps maintain their health and appearance. Finally, any stray hairs are trimmed, and the braids are adjusted for a polished finish.
Box braids are a timeless and versatile hairstyle that has been popular for decades. Not only do they provide a stylish and chic look, but they also offer a protective style for those with natural hair. However, the cost and time associated with getting box braids done at a salon can be daunting. That’s where a DIY box braids tutorial comes in handy. With the right techniques and tools, anyone can achieve beautiful and long-lasting box braids in the comfort of their own home. In this article, we will guide you through an easy step-by-step tutorial on how to create your own box braids, saving you both time and money.
From preparing your hair to the braiding technique and finishing touches, we will cover all the essential steps and tips to help you achieve flawless box braids. Whether you are a beginner or a seasoned braider, this tutorial will provide you with the knowledge and confidence to create stunning box braids that will turn heads. Get ready to elevate your hair game with this easy DIY box braids tutorial.
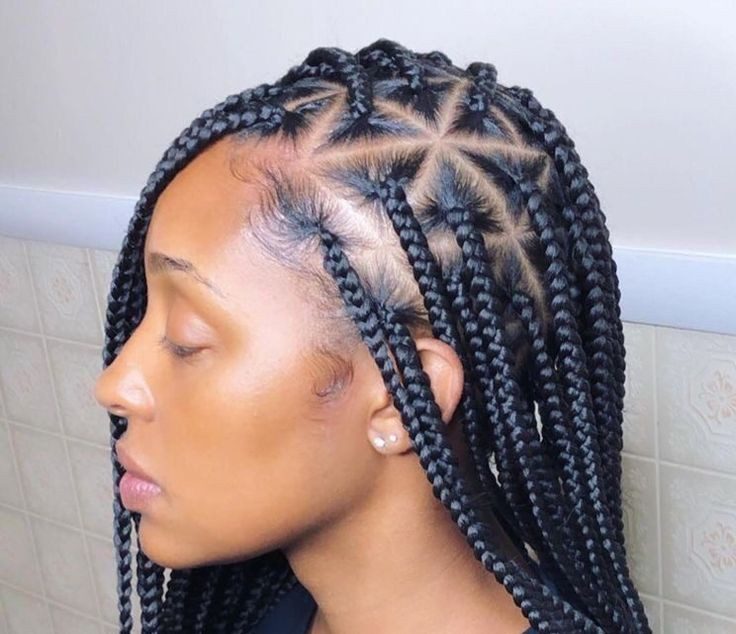
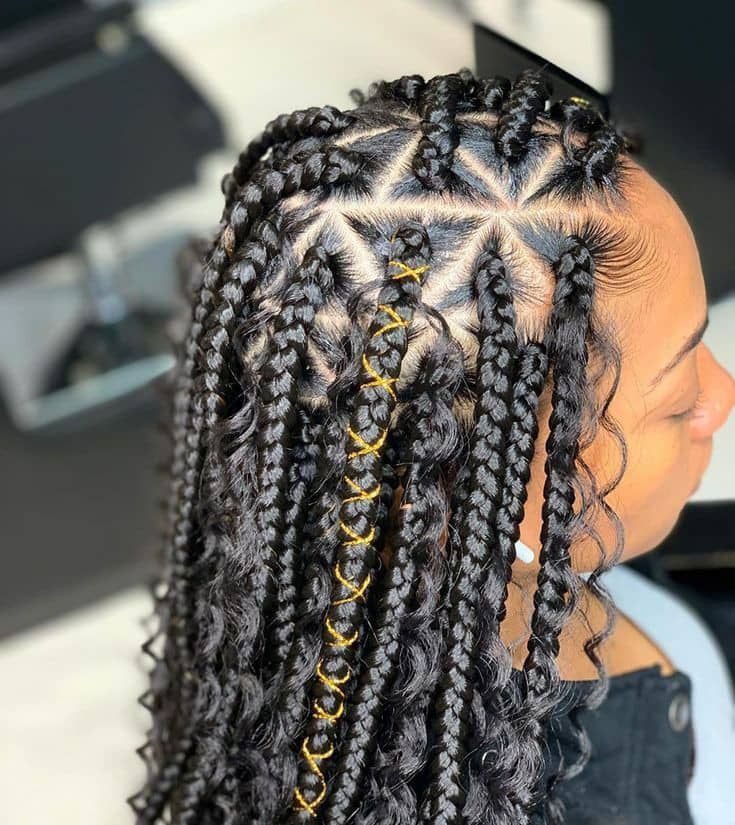
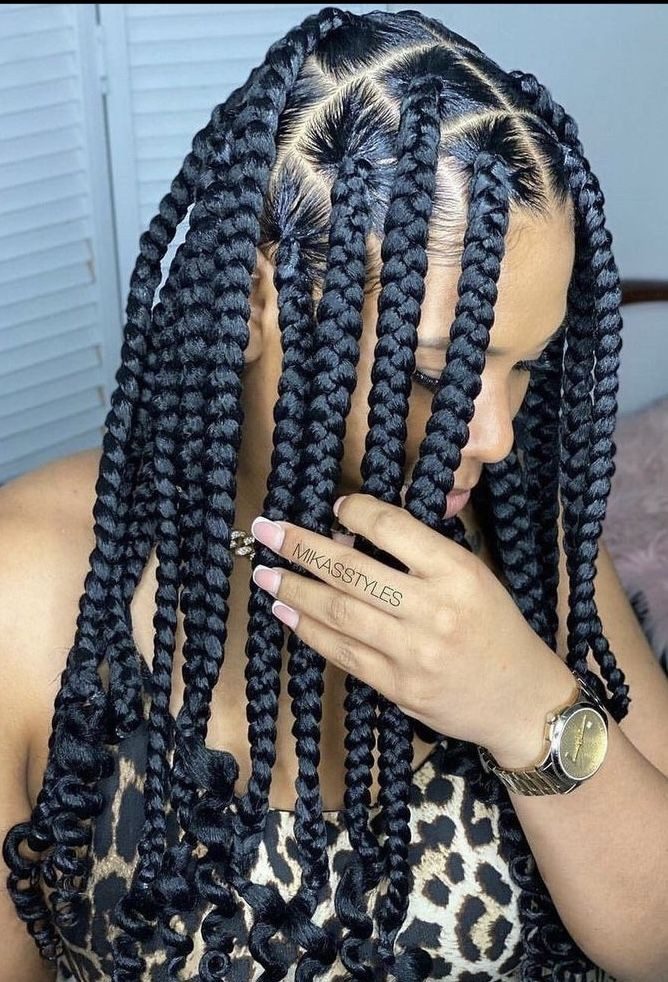
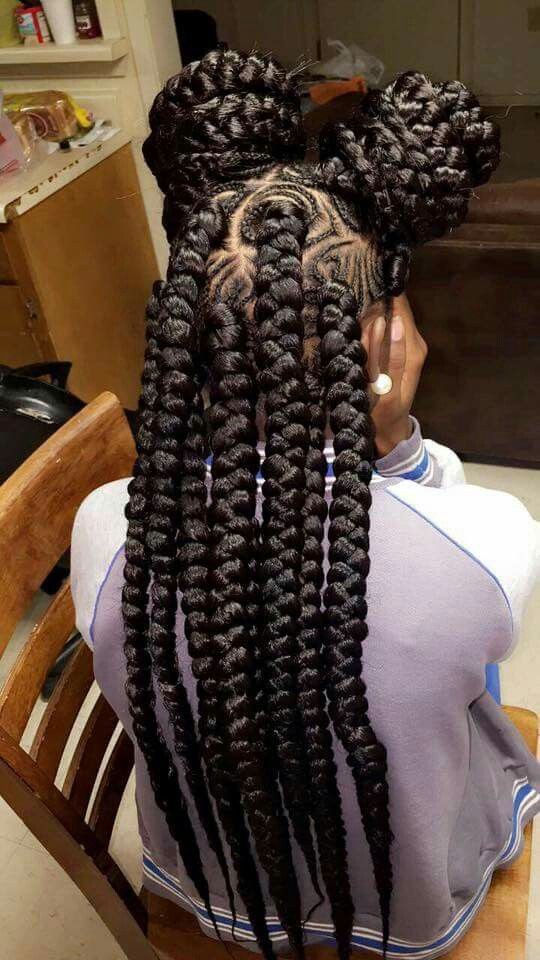
Medium sized box braids tutorial (easier than jumbo braids)
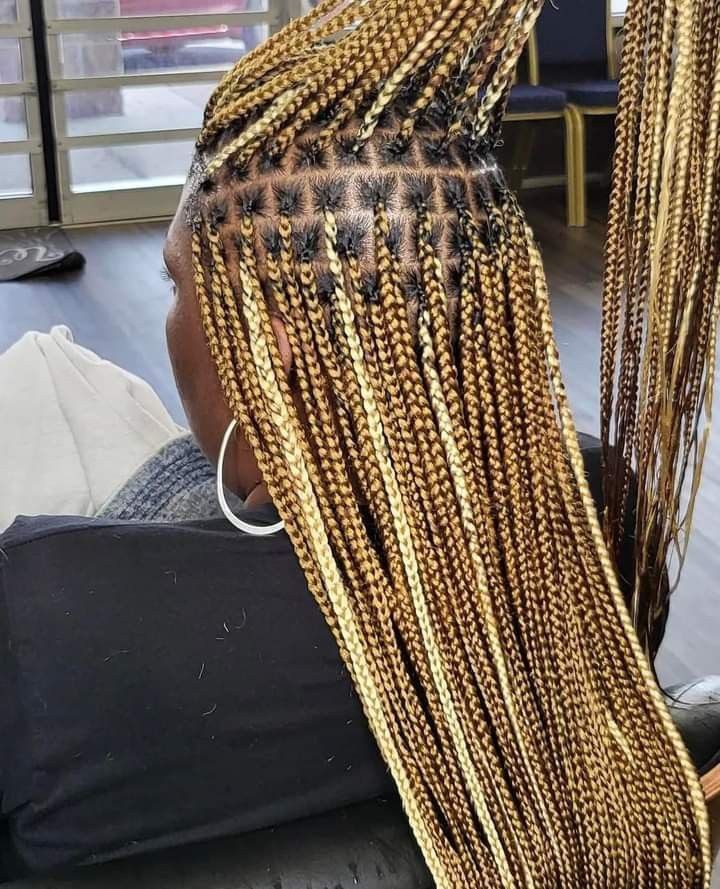
Medium-sized box braids are a simpler alternative to jumbo braids and involve several steps. Begin by washing and detangling the hair, followed by sectioning it into medium-sized portions. Extensions can be added for extra length and thickness if desired.
Employ the box braiding technique, crossing strands over each other, and secure the ends with small elastic bands or hot water. Repeat this process for each section until the entire head is braided. Styling with beads or accessories is optional. Regularly moisturize the scalp and braids for maintenance, and trim any stray hairs for a neat finish.
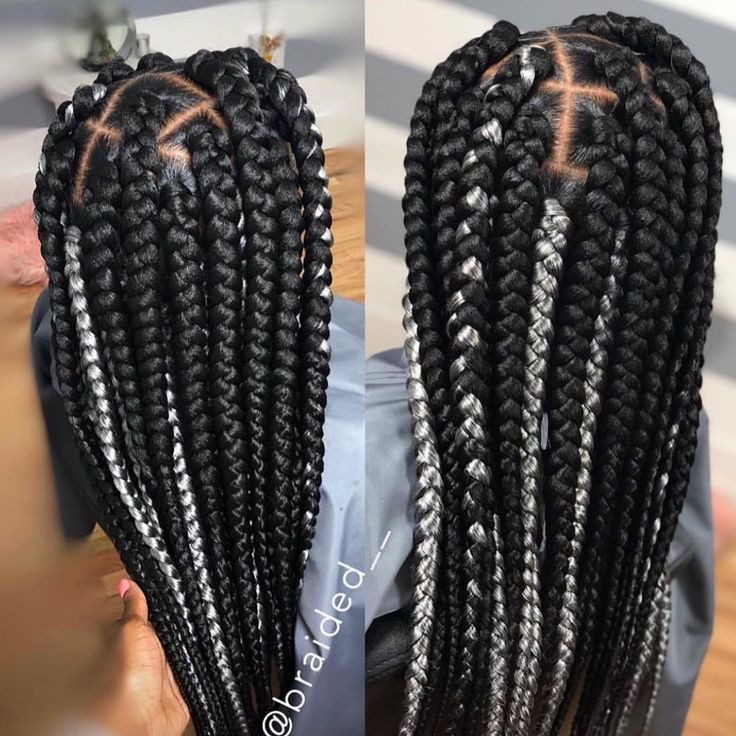
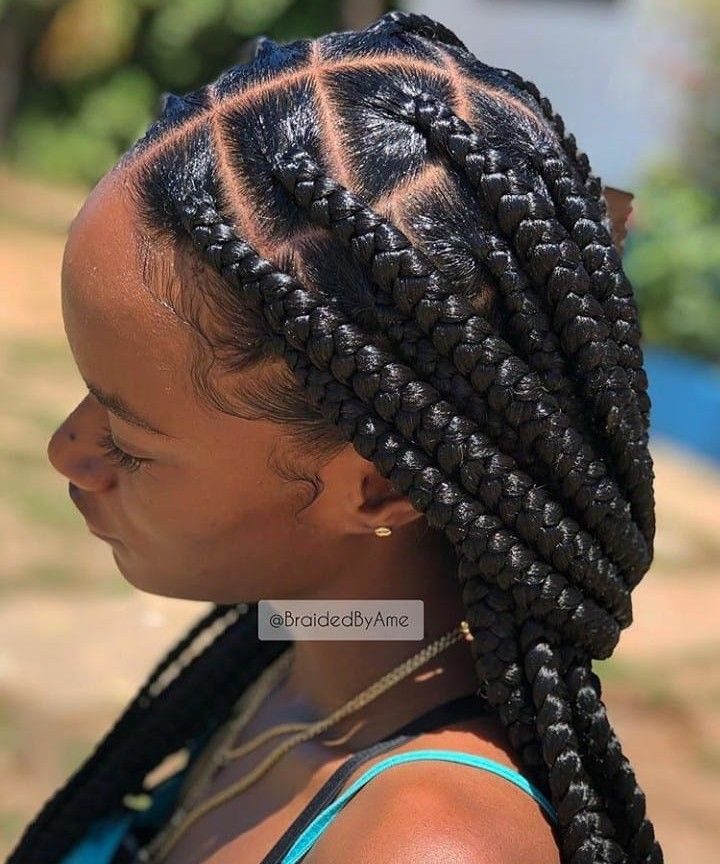
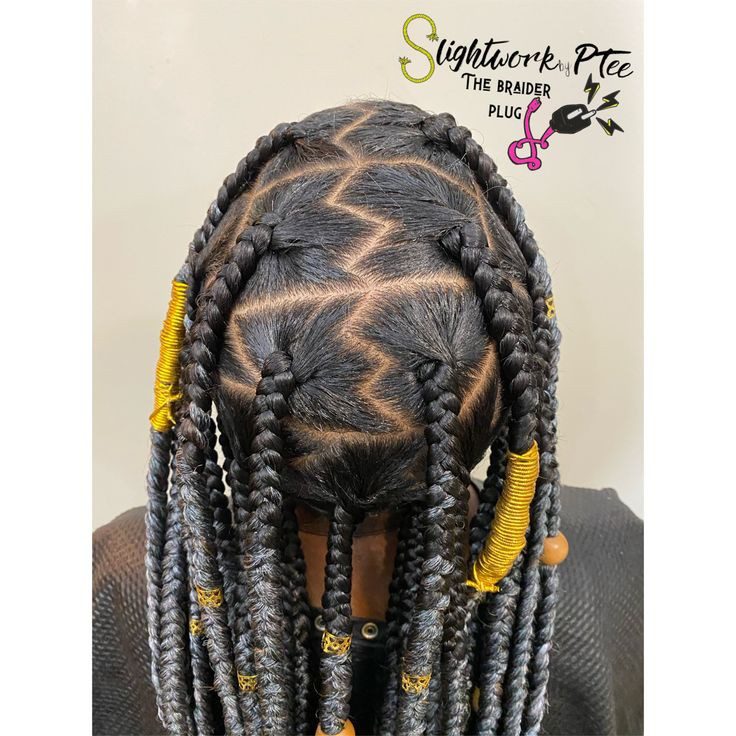
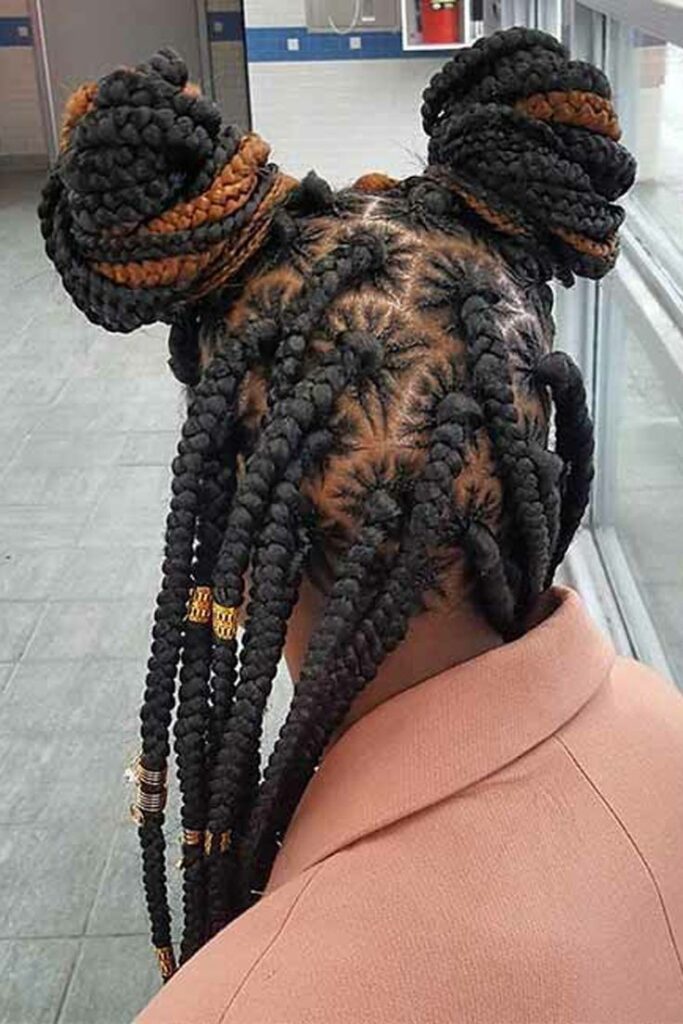
Rubber band method box braids (simplifies the braiding process)
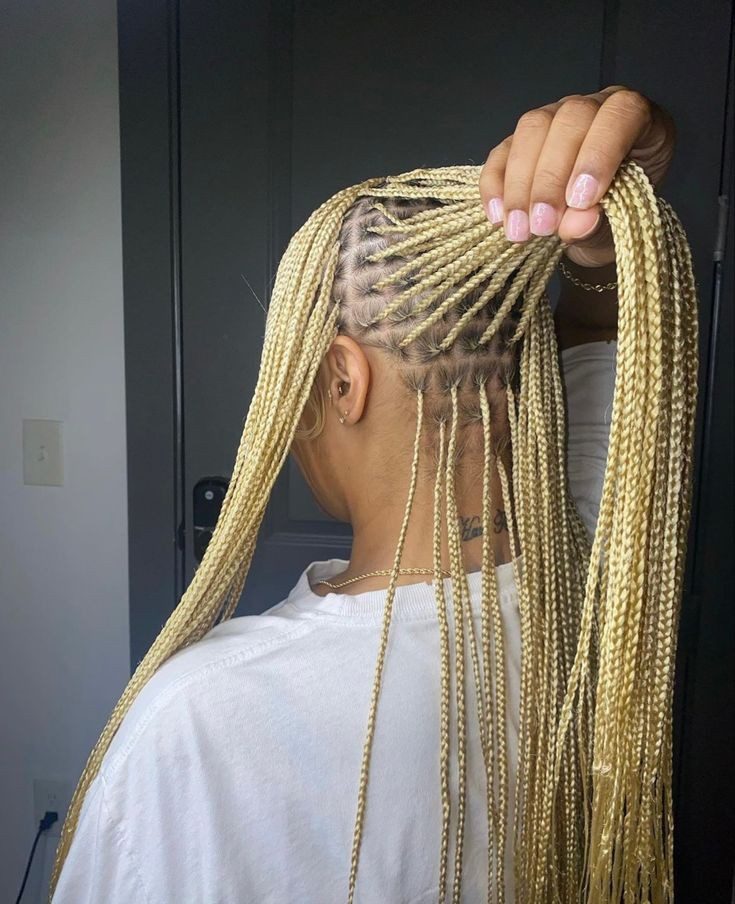
The rubber band method for box braids simplifies the braiding process by adding elastic bands at the base of each section before braiding. This technique involves dividing the hair into sections, securing each section with a rubber band at the root, and then braiding the hair downward. The rubber bands help to maintain the sections neatly in place, making it easier to braid without the risk of loose strands. Additionally, the rubber bands provide a sturdy anchor for the braids, ensuring they stay in place for a longer period. This method is particularly useful for beginners or those looking for a quicker and more efficient way to achieve box braids.
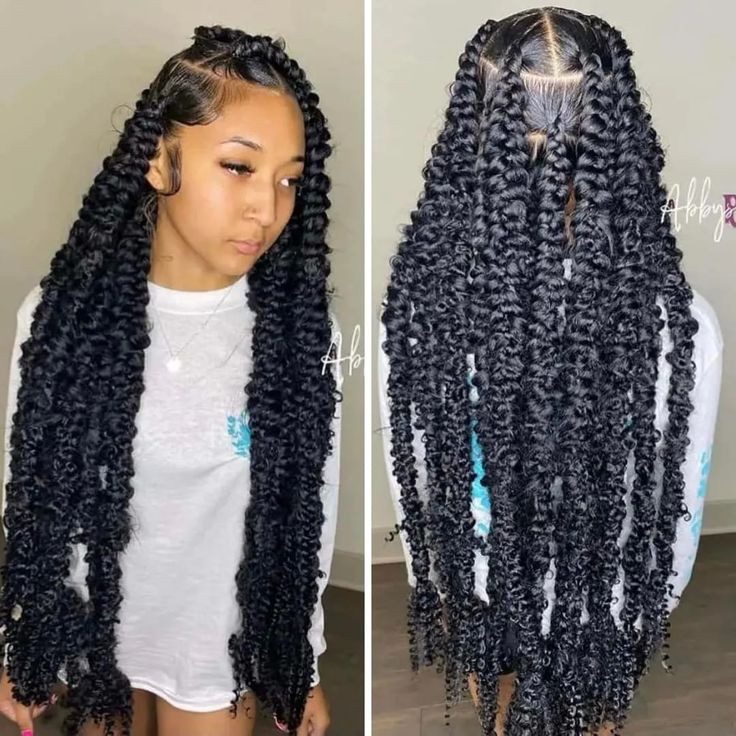
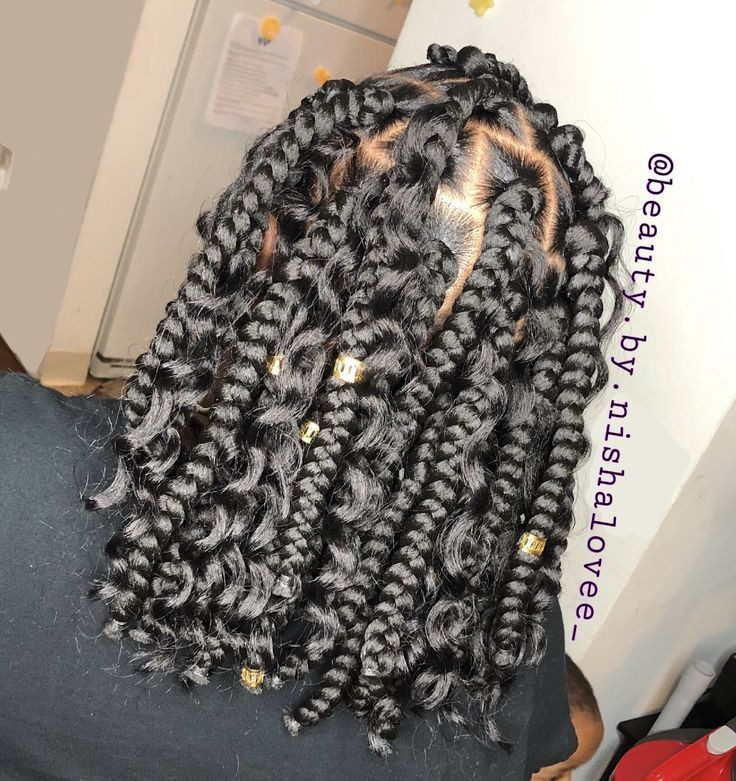
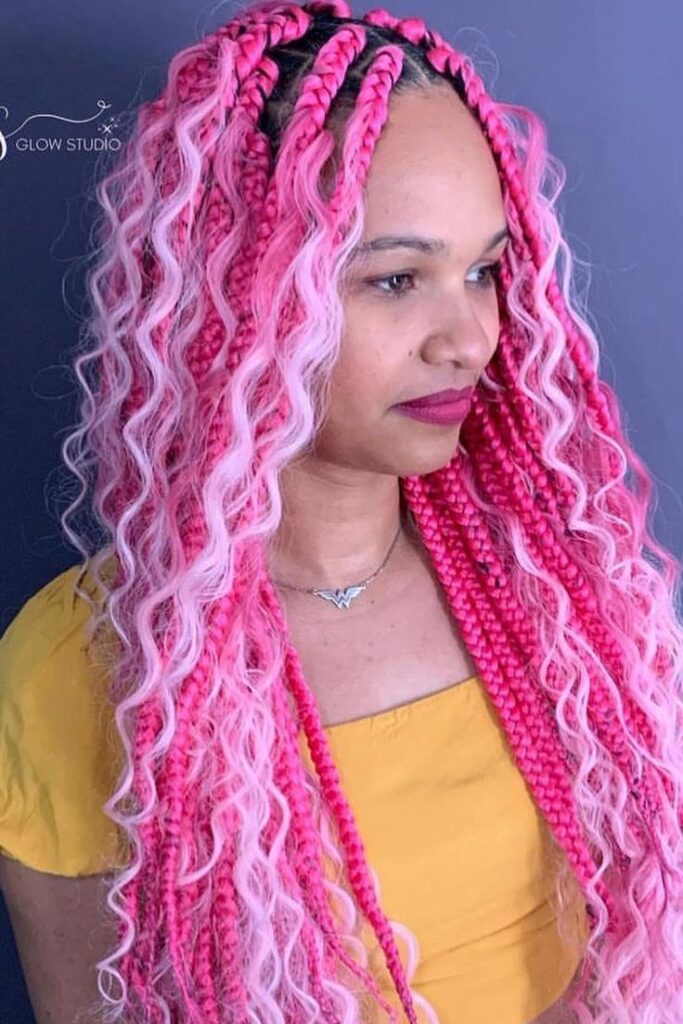
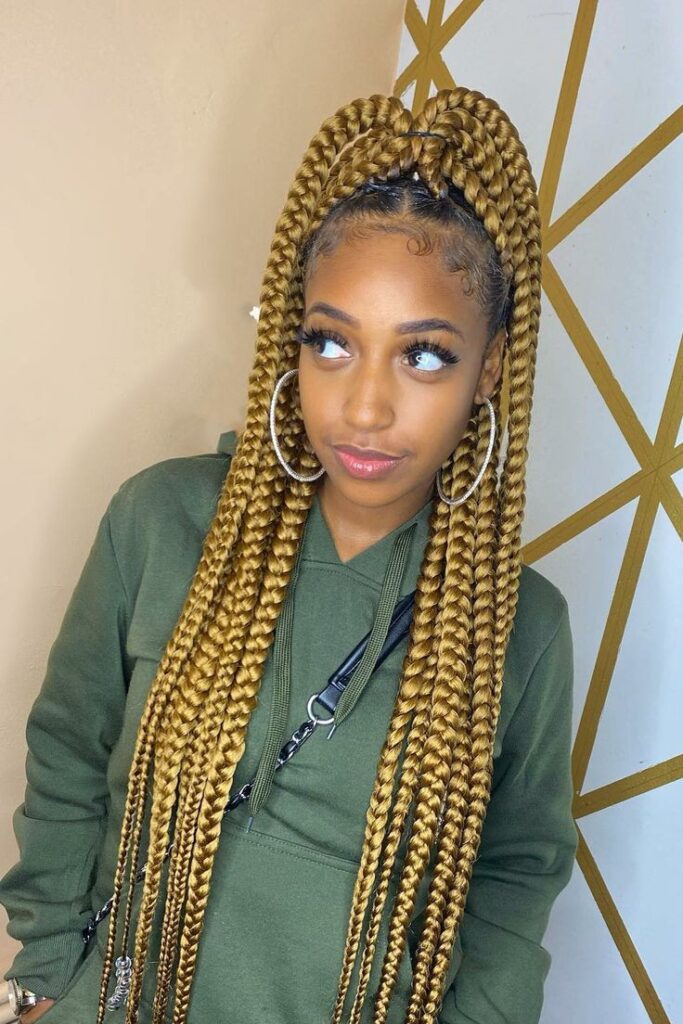
Box braids with crochet hair (faster alternative to braiding with braiding hair)
Box braids with crochet hair offer a faster alternative to traditional braiding methods. This technique involves using pre-looped crochet braids, which are attached to the natural hair using the crochet method. Instead of individually braiding each section of hair, the crochet hair is looped through the natural hair, creating the appearance of braids.
This process significantly reduces the time required for braiding, making it a convenient option for those seeking a quicker styling method. Additionally, crochet box braids come in a variety of colors, lengths, and textures, allowing for versatility in styling options.
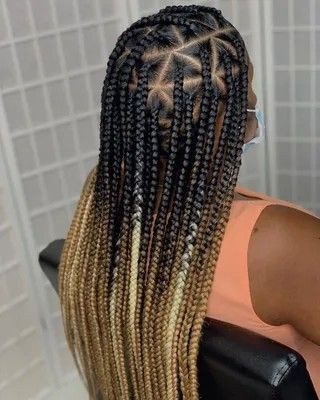
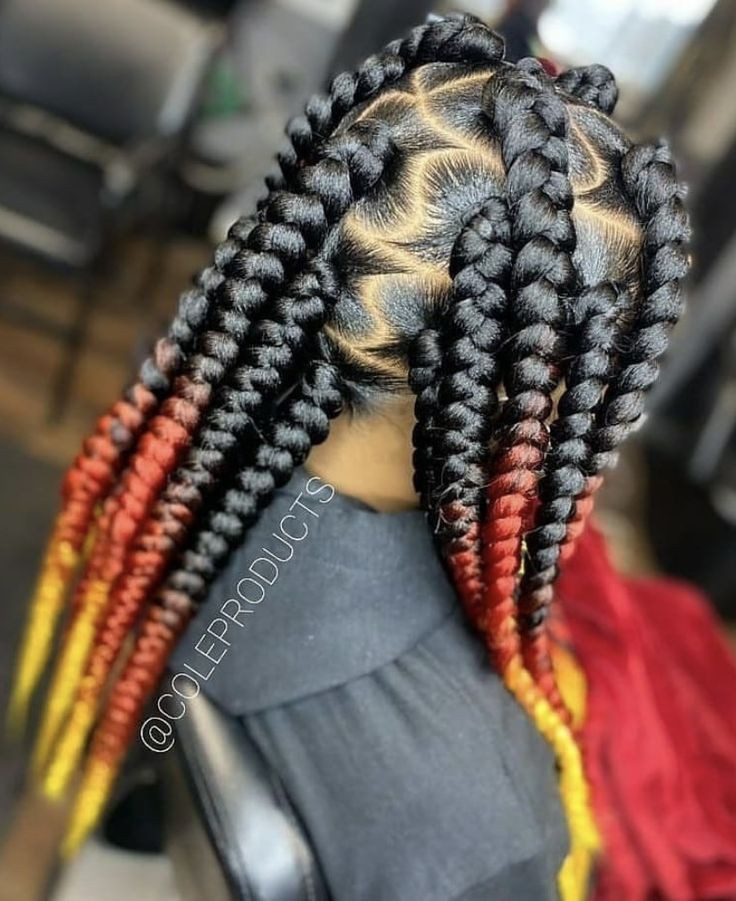
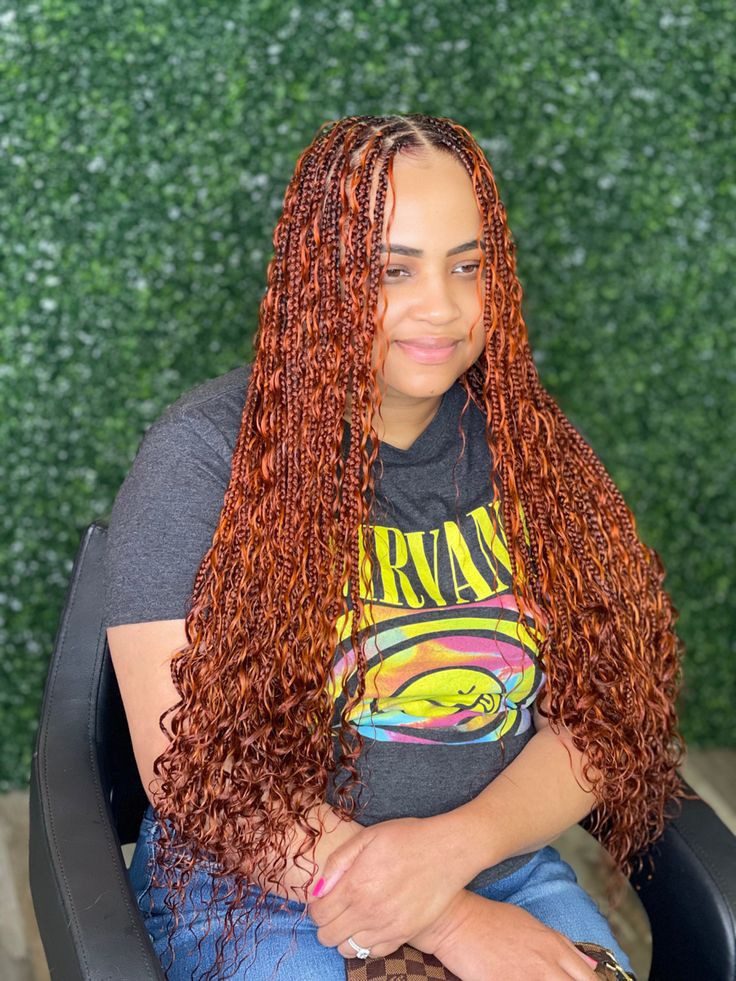
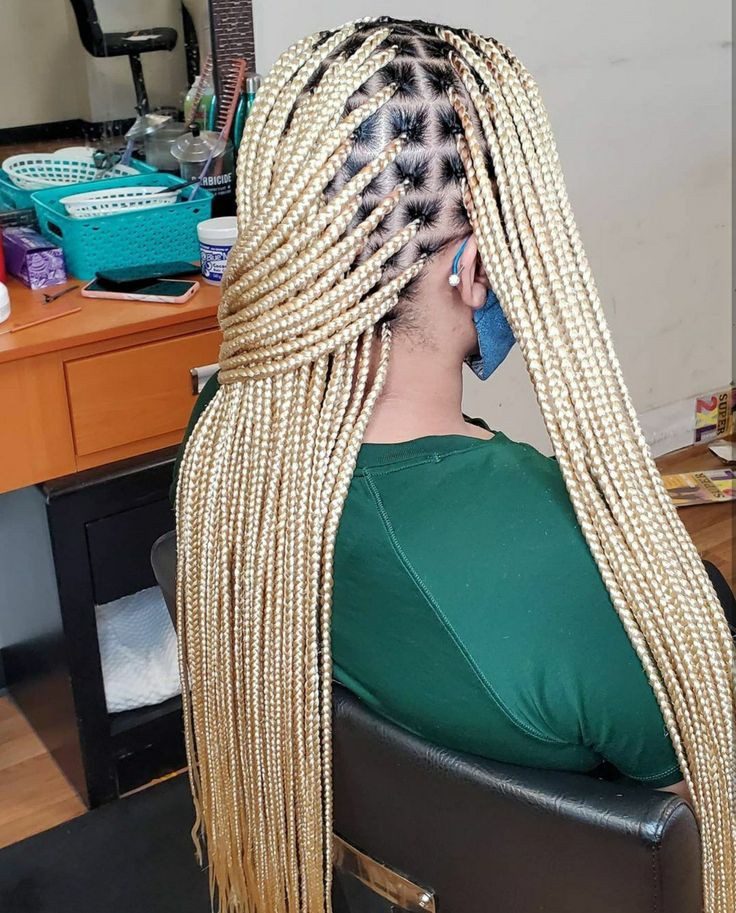
Waist-length box braids (can be done in sections for manageability)
Achieving waist-length box braids can be manageable by dividing the hair into sections for easier handling. Start by washing and detangling the hair, then divide it into smaller, more manageable sections. Begin braiding each section, incorporating extensions if desired, and continue until the braids reach waist length.
Working in sections helps to maintain control over the braiding process, ensuring that each braid is uniform in size and length. Additionally, it allows for breaks if needed, reducing fatigue and making the overall process more comfortable. Once all sections are braided, secure the ends and style as desired for a stunning waist-length box braids look.
How to Do Box Braids at Home: Easy Step-by-Step Guide
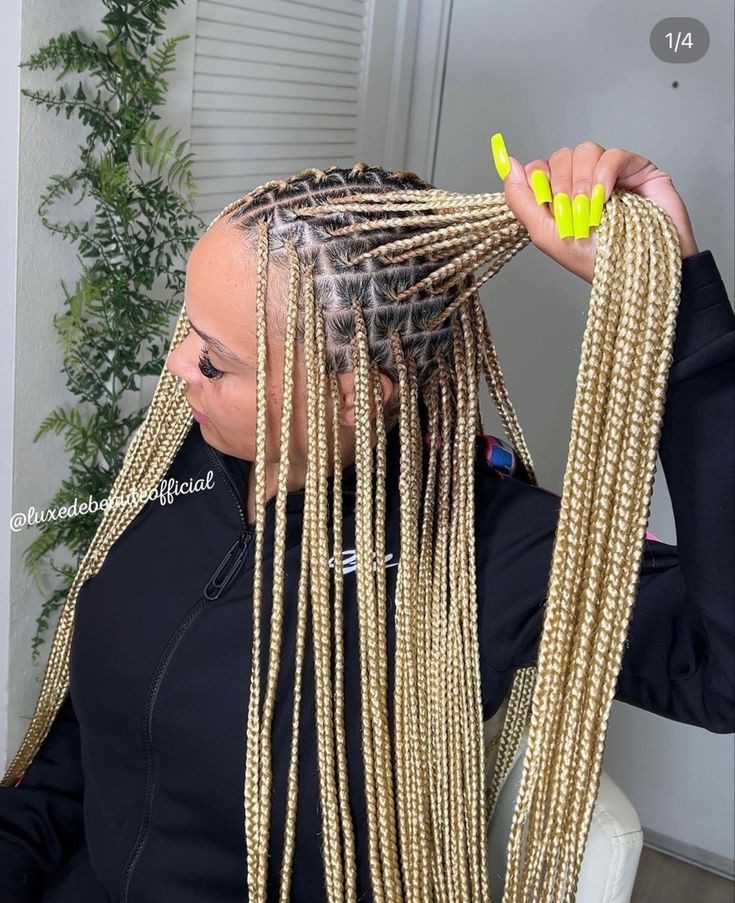
Here’s an easy step-by-step guide on how to do box braids at home. Begin by preparing your hair with a thorough wash and detangling session, ensuring it’s completely dry. Section your hair evenly, using a comb, and consider adding synthetic braiding hair to each section for added length or thickness. Start braiding by dividing each section into three equal parts and crossing them over one another, incorporating small sections of hair as you go.
Braid each section to your desired length, securing the ends with elastic bands or hot water for synthetic hair. Repeat this process for each section until your entire head is braided. Optionally, style your braids in various ways and maintain them by moisturizing your scalp and braids regularly. Lastly, trim any stray hairs and adjust the braids for a polished finish. With these simple steps, achieving beautiful box braids at home is easily manageable.
Achieve flawless box braids at home.
Creating beautiful and flawless box braids at home is an achievable task with the right techniques and tools. By following a few essential steps, you can create professional-looking box braids without having to visit a salon. Firstly, ensure that your hair is clean and well-conditioned before starting the braiding process. This will help in achieving a smoother and neater finish. Additionally, make sure to section your hair evenly, using clips or hair ties to keep each section separated.


When braiding, be mindful of the tension you apply to your hair to avoid discomfort or breakage. Remember to maintain a consistent size and shape for each braid, using a rattail comb to create clean parts. Finally, be patient and take your time with each braid, ensuring that they are tightly secured at the root and evenly braided all the way down. With practice and attention to detail, you can proudly achieve flawless box braids in the comfort of your own home.
Tools and products you’ll need.
To achieve perfect box braids at home, you will need a few essential tools and products. Firstly, invest in a wide-tooth comb or detangling brush to ensure that your hair is free from any knots or tangles before starting the braiding process. This will make it easier to create clean and precise parts. Additionally, a rattail comb will be helpful in creating straight and even sections for each braid.
To secure the braids at the root, you will need small hair elastics or rubber bands. It is also recommended to have hair clips or hair ties on hand to keep the sections separated while braiding. To enhance the longevity of your braids and minimize frizz, consider using a moisturizing leave-in conditioner or hair oil. Finally, having a good quality hair extension or braiding hair that matches your natural hair color will help add length and thickness to your braids. With these tools and products, you will be well-equipped to achieve stunning box braids in the comfort of your own home.
Step-by-step braiding instructions included.
Within the comprehensive “Easy DIY box braids tutorial” provided, detailed step-by-step braiding instructions are included to guide you through the entire process. These instructions are designed to ensure that even beginners can achieve professional-looking results.


From creating clean and precise parts to securing the braids at the root, each step is carefully explained to help you achieve the desired outcome. Additionally, tips and tricks are included to help minimize frizz and maintain the longevity of your braids. With these thorough instructions, you can confidently embark on your box braid journey and create a stylish and beautiful hairstyle.
Tips for a long-lasting style.
To maintain a long-lasting style with your box braids, there are several tips you should keep in mind. Firstly, it’s essential to properly care for your braids by regularly moisturizing them with a lightweight oil or leave-in conditioner to prevent dryness and breakage. Additionally, wearing a satin or silk scarf or bonnet at night can help protect your braids and minimize friction that can cause frizz.

When washing your braids, opt for a gentle cleansing solution and avoid excessive manipulation to prevent unraveling. Finally, consider refreshing your style by re-braiding any loose or fuzzy sections and using a edge control gel or spray to tame any flyaways. By incorporating these tips into your routine, you can enjoy a long-lasting and polished look with your box braids.
Save money and time with DIY.
Creating your own box braids at home can not only give you a sense of accomplishment but also save you both money and time. By learning the art of DIY box braids, you eliminate the need for costly salon appointments and lengthy waiting times. With practice, you can master the technique and achieve professional-looking results in the comfort of your own home. Moreover, you have the freedom to customize your braids to suit your desired length, thickness, and style, without having to rely on someone else’s interpretation. Embracing the DIY approach empowers you to take control of your hair care routine while saving both your hard-earned money and valuable time.
In conclusion, box braids are a versatile and timeless hairstyle that can be achieved at home with a few simple tools and techniques. With the right preparation and patience, anyone can create beautiful and lasting box braids. Whether you’re looking for a protective style or just want to switch up your look, this easy DIY box braids tutorial is the perfect solution. So why not give it a try and see the amazing results for yourself?